Originally published at: https://tidbits.com/2026/01/05/why-i-use-multiple-screenshot-utilities-on-the-mac/
I take a lot of screenshots—over 500 since July 2025, when I started using ScreenFloat in favor of my previous preferred screenshot utility, CleanShot X. But I keep CleanShot X loaded at all times and use it regularly, too. On occasion, I even fall back on the screenshot functionality built into macOS in conjunction with several other image editing and processing apps. Here are the unique features that keep me using multiple apps for my screenshots.
ScreenFloat: Floating Shots and Shot Browser
ScreenFloat ($17.99, also in Setapp), from Eternal Storms Software, sets itself apart in two ways. First, when you take a screenshot, ScreenFloat displays it in a new window right on top of the selected window or area. (The window below shows ScreenFloat’s settings for floating shots.)

Three menus at the top of a floating shot window let you name, tag, and describe the screenshot ➊; export it in a variety of formats ➋; and work with its contents in numerous ways, ranging from basic edits and annotations to content redactions and more ➌. You can even run shortcuts and AppleScripts on the screenshot.

Most of the time, I dismiss floating shot windows immediately, but they can be useful for referring to a screenshot—such as the contents of a menu that I can’t keep open—while writing. Floating shots are also handy for making simple edits and annotations without opening the file in Preview. The feature I value most, though, is one that ScreenFloat developer Matthias Gansrigler added last year—the option to export an image with an added border.
All Mac screenshot utilities allow you to take screenshots without the shadows that keep stacked windows from bleeding into one another. (It’s usually a matter of pressing the Option key while capturing the screenshot.) Eliminating shadows is desirable for authors and readers because shadows significantly increase the vertical height of screenshots, adding whitespace and making documents longer (see below left ➊). Unfortunately, the window’s border is part of the shadow, so ignoring the shadow gives you a window that’s often pure white on the edges (below center ➋). What many of us in the documentation world have settled on is a thin border that follows the window’s rounded corners (below right ➌). (For some history on this topic, see “How to Eliminate Drop Shadows in OS X Screenshots,” 25 April 2015).

The key to ScreenFloat’s bordering capability is its cleverly implemented export options. At the top of a floating shot window, you’ll find a small document icon. Drag it to export the screenshot in your default format without a border. But if you click the icon to open its menu first, you can then drag one of the format icons to export with a border. (CleanShot X can also border screenshots, but its borders don’t follow the rounded corners of Mac windows and thus look awkward in the corners.)

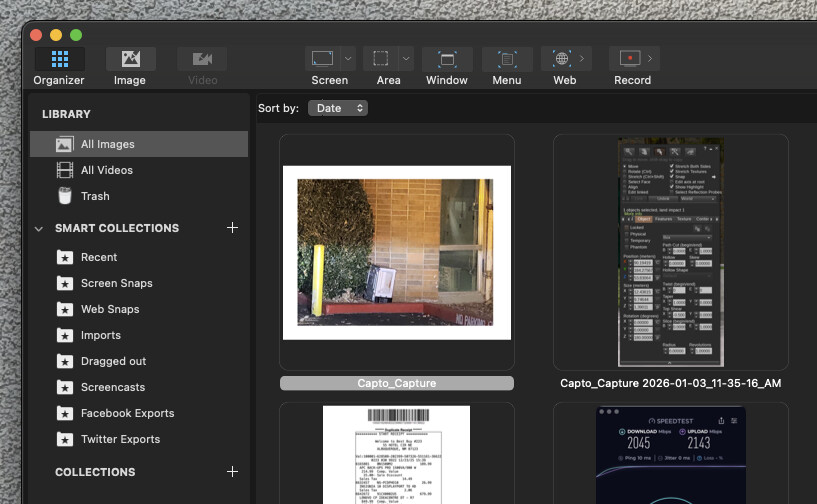
ScreenFloat’s second innovative feature is that it stores all your screenshots in the user Library folder and allows you to manage them in a Shot Browser window accessible with a keystroke.

You can search for text in screenshots, delete unwanted screenshots, rename them, organize them in folders, and much more. They can even sync via iCloud if you want access to all your screenshots on multiple Macs. But the real win is that you can open any previous image and modify any edits you previously made. It’s all too common for me to take a screenshot, edit or annotate it, and drop it into an article, only to realize later that I wanted to change the edit or annotation. Before ScreenFloat, I often had to retake screenshots just to edit or annotate them again.
I also find the Shot Browser handy for reducing the number of temporary screenshots that otherwise end up on my desktop. I seldom want to go back to screenshots after I’ve published an article, but it could happen, and as long as I have plenty of disk space, I’m happy to see the collection grow.
CleanShot X: Combine Screenshots
So why do I continue to use MTW’s CleanShot X ($29, and also in Setapp)? Because it has one killer feature that I use regularly—twice in this article alone, in fact. CleanShot X is a thoroughly capable screenshot utility with editing and annotation features, but it also offers a feature I haven’t seen elsewhere: the ability to combine screenshots.
Whenever I need to put multiple screenshots side by side, I drag one of them to CleanShot X’s menu bar icon to open it. Then I drag the next one into that window, and CleanShot X indicates that dropping it will place it on the left, right, top, or bottom. If the images are different sizes and resolutions such that one appears much larger than the other (common when combining Mac and iPhone screenshots), I can drag the corner handles to resize them to match. If I have to rearrange them, alignment guides ensure that they all line up.

Before CleanShot X added this feature, I hadn’t had a good solution for combining Mac screenshots for years. Long ago, I wrote a Keyboard Maestro macro that combined two screenshots, but it was primarily for iPhone screenshots, which I now do with Federico Viticci’s Apple Frames shortcut. Napkin, by Aged & Distilled, did a good job, but development on it stopped years ago, and I eventually gave up on it (see “The 46 Mac Apps I Actually Use and Why,” 19 April 2023).
macOS Screenshots: Composited Screenshots
Despite everything these two screenshot utilities can do, I still occasionally press Command-Shift-5 and use the built-in macOS screenshot utility to create a screenshot of a window with an open menu. In these screenshots, I don’t want shadows around the window, but I do want them around the menu, which otherwise looks weird. This requires a multi-step process that involves capturing two separate screenshots and compositing them in Preview:
- Click the menu in the desired window to display it.
- Press Command-Shift-5 to open the macOS screenshot utility.
- Press the Space bar, hold down the Command key, hover over the menu to highlight it, and click the mouse button to capture a screenshot with a shadow (the default behavior).
- Press Command-Shift-5 again.
- Press the Space bar, hover over another part of the window to highlight it, and Option-click the mouse button to take the screenshot without a shadow.
- Open both images in Preview, copy the entire menu screenshot, paste it into the window screenshot, and position it appropriately.
- Save the composed screenshot and use Retrobatch to add a border.

A few notes:
- Both ScreenFloat and CleanShot X can capture windows with shadows by default but toggle that setting off with an Option-click. However, they can’t currently do the opposite—regularly capture windows without shadows but toggle the shadows on with an Option-click. It’s easier to use the built-in macOS screenshot utility than to change settings in either of the other apps.
- ScreenFloat doesn’t, as far as I can tell, offer any way to combine two screenshots. CleanShot X can do this easily, as noted above. I hadn’t internalized this fact before, but working in CleanShot X is probably a little easier than using Preview.
- Step 7 mentions using Retrobatch to add a border, which requires explanation. Before ScreenFloat, Joe Kissell showed me how to use Flying Meat Software’s Retrobatch ($19.99) to add proper borders to screenshots through batch processing. (Before that, we used an Automator workflow.) I still use Retrobatch for screenshots already on my desktop. However, some exploration reveals that ScreenFloat can help here too—you can drag any screenshot into the Shot Browser and then export it with a border by dragging an icon from the export dialog.
Ultimately, the moral of the story is that although Apple’s built-in screenshot utility in macOS is pretty good, third-party developers have created some excellent alternatives that offer welcome features for those who need more power. I feel a little silly using both ScreenFloat and CleanShot X, but since their most important features for my workflow don’t overlap, so be it.