Adobe Photoshop Elements 2020 (I don’t know about previous versions) has a menu option to automatically “Divided Scanned Photos”. It works very well. I’ve used it to crop and separate strips of negatives after scanning them.
In reality, for me that is not an issue.
The who what when where & keyword info I need is stored with the image in Photos and that’s important.
When I want to take out the original it is invariably for printing - and the metadata becomes completely irrelevant then. Similarly if I’m using the image in another image that I might be working on. That new image will get its own metadata when I write it in Photoshop.
Reviving this thread a year-plus later as I grabbed some more slides from my parents.
I need to dig deeper into VueScan again, I seem to remember last year I was able to select what type of film or slide I was using and I don’t see that option in the Epson software so maybe that was VueScan? I do have an updated machine I can put the Epson on to see how newer software is, but it would honestly be a hassle to use it that way, so I’m still on Sierra.
My problem now is I’m getting some artifacts and I don’t know if it’s just because I’m working with 40-50 year old material or if I have a setting wrong.
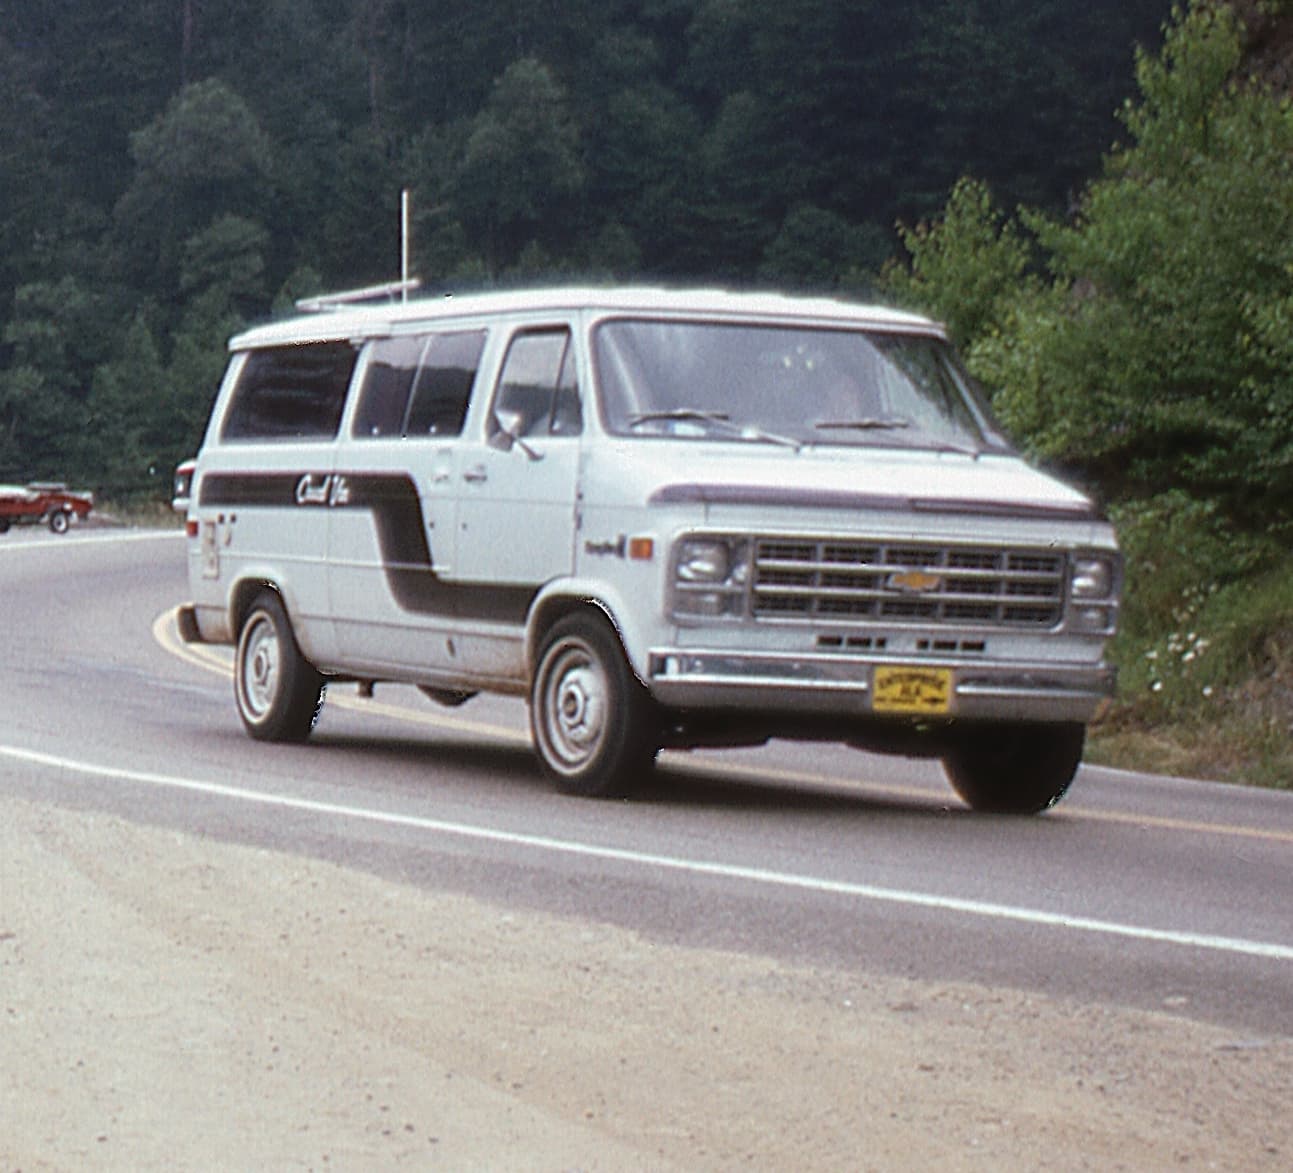
I’m leaning towards the latter because going through this thread, I see Richard mentioned not using ICE for Kodachrome. Would this be the result of using ICE? You can see the issues around the wheels/tires.
Thanks!
Diane
Silverfast, bundled with the higher end Epson scanners, offers what you mention, the ability to specify which film you are scannnig, including Kodachrome. Kodachrome seems to need particular attention and has it’s own mode within Silverfast.
I do have the free version of Silverfast that came with the scanner and hate the UI! I’ll have to see if I can download a demo of the pay version to see if I like it better.
I know I did it on what I used last year so I guess it must’ve been VueScan.
Diane
I found what I was looking for, it’s on another tab in VueScan, providing you setup the first tabs correctly. Now I’ll do some testing between the two programs with the Ektachrome and Kodachrome.
Thanks
Diane
Digital ICE (and other related IR-based automatic dust/scratch removal) has problems with Kodachrome, due to the high density of the emulsion (especially for dark regions of the image). The image prevents the IR light from making its way through the slide, resulting in some dark regions being mis-identified as a defect.
If your software doesn’t have explicit support for IR-based scratch removal on Kodachrome, you probably won’t be happy with the results.
And FWIW, you can not use IR-based scratch removal with B&W film at all. Its silver halide chemistry is incompatible with the tech.
Check out what version you have. The least expensive version of SilverFast (“SE”) does not support Kodachrome. You need to go up to the next tier (“SE+”) to get Kodachrome support. See also SilverFast 9 comparison chart.
You can download a free evaluation copy. If you decide you want to keep it, you can buy a license key from their web site, which will permanently unlock all features available on the tier you paid for. Depending on how old your bundled copy is, you may also qualify for upgrade pricing.
According to SilverFast, using infrared scratch removal (their “iSRD” option) requires special handling when used with Kodachrome. if you have an installation with Kodachrome support, the software will automatically switch in the Kodachrome-iSRD software when you configure it for both iSRD and Kodachrome scanning.
2 Likes
Hi Diane. Yes, looking at the image you posted, the artifacts around the wheel wells and other locations are caused by Digital ICE with Kodachrome.
If you end up using the Kodachrome-iSRD software David C. mentions let us know how it works out.
If using the Epson software you can either scan your Kodachrome slides without Digital ICE, or for the ones that are particularly dirty (even after careful cleaning), you can do two scans: one with Digital ICE, and one without. Then, using Pixelmator or Photoshop or similar, put the Digital ICE version on top and cut out the artifacts to reveal the non-DI version underneath. (Or put the non-DI version on top and cut out the areas that don’t have much visible dirt). Or live with the dirt, sometimes it’s aesthetically pleasing because it adds some old school charm to the shots. ![]()
The 64-bit Epson software no longer includes Digital ICE, unless they reinstated it since I was doing the slide scanning several years ago. I found the 32-bit Epson software’s Digital ICE was much better quality than the VueScan and Silverfast infrared scanning dust removal options, maybe because it didn’t offer parameters so they were forced to tune it to work well from the get-go. I used a virtual machine with Mojave so that I could scan with the old 32-bit software. A Windows 10 virtual machine will accomplish the same thing.
I wrote up a slide and photo scanning guide for the Epson software–let me know if you need it and I’ll see if I can dig it up.
1 Like
Thanks for the confirmation! I’m going to do more testing this week. I tried with VueScan again yesterday and again am unhappy with the fiddling I have to do on selecting the slide scan area. Last year I posted a scan result from both Epson and VueScan and the Epson one looked nicer and that’s kind of why I stayed with it. But I’m not done experimenting and willing to try new software.
And now I know I need to pay attention to the Digital Ice setting. That probably explains some issues I had with B&W negatives last year as well.
IF it’s easy to find the guide you wrote I’d be very interested in reading it.
Thanks!
Diane
1 Like
There’s also Mark Segal’s Scanning Workflows book which is a very detailed look at using Silverfast.
2 Likes
Not sure why you are having trouble selecting the scan area.
I’m using the Pro version and have manual selected in my cropping menu.
I just adjust the crop as I would in PS or any other apps that use a selection box, by dragging the corners or even the sides/top/bottom.
Hi again. I’ve DM’d you the guide. :-)