Originally published at: Ensure Sufficient Free Space before Upgrading to Big Sur - TidBITS
If you initiate an upgrade to Big Sur from a previous version of macOS but don’t have sufficient free space—at least 35.5 GB—you could end up in a Boot Recovery Assistant loop that can be exceedingly difficult to escape. Never update macOS without enough space or a current backup!
The case could be made that the paltry, default storage included in newer Macs is at least partly responsible for this issue, especially the 256GB option.Users can quickly fill up storage with photos, videos, music, documents, etc. Then when they update macOs they don’t have enough spare room for the process.
Sure, though if Apple increased the cost of the base level Mac by $200 to match with a 512 GB default storage level, people would complain about that too. Let’s stay focused on the issue of the installer and recovering from the problem.
Any Mac’s storage can be filled by media. It’s not just people who choose small size SSDs.
How many downloaded movies do you think it would take to fill even a 2TB volume?
Ultimately, Apple needs to implement one fix, and I would like to suggest a second:
-
The upgrade installer must have an accurate estimate of required storage. If it’s not available, it must refuse to run. This is almost certainly a bug, since other upgrade installers do this, but there’s no excuse for letting this slip through the cracks.
-
I think Apple should allow installation from external media. If your internal SSD is full, you should be able to copy the installer to external media (flash drive, SSD, hard drive, etc.) and run it from there. When run in this capacity, it should use the external media for its temporary file storage. This will (hopefully) limit the free space required on the internal volume to that needed to hold the upgraded installation and little more than that.
1 Like
Sorry Adam. Hit a sore spot. Anyway, did have an issue with 2016MBA that ran out of space with latest Big Sur update. After spending a few hours backing up, finding snapshots from old TM issue, the owner decided to “buy new MacBookAir” with ample storage.
Without trying to argue the merits of Apple’s decision, here are some possibly interesting data points:
-
Cheap PCs also ship with configurations I would consider below the point of being useless. For example, the least expensive Windows 10 PC on WalMart’s web site is a $200 Gateway GWTC116-1, which only includes 4GB RAM and 64 GB storage. And the storage is eMMC - effectively a soldered-down SD card.
I realize that Apple doesn’t sell anything at the $200 price point. My point is simply that least-cost options from all brands are going to be stripped-down, and the PC world has examples that are far more useless than anything Apple sells.
-
My current personal laptop (a 2011 MacBook Air) has only 4GB RAM and 128 GB storage. It is running macOS 10.12 (Sierra). For what I use it for (general web surfing and remotely logging into my other computers around the house), it works fine. The storage is not a problem for me because it connects to my home’s server (which has 2TB of storage) for accessing my media collections.
Although I wouldn’t want this configuration on my main/only computer, I also wouldn’t want to spend more for a computer used in this capacity.
-
Apple probably should publish something like a buyer’s guide with recommendations for how much RAM/storage/CPU is appropriate for different use-cases. For instance:
- Minimal configuration for web browsing, streaming, office applications, and only light multitasking (not running multiple large apps at once)
- Larger configuration(s) for content creation, more multitasking
- Extra storage to store media collections. Include some typical sizes (e.g. how many songs/movies can you expect to store in different capacities.) Similar to how they used to advertise iPod capacities. And include a comment about external vs. internal storage.
Maybe we should prepare such a buyer’s guide if Apple doesn’t. 
1 Like
Seeing that Apple lacks the integrated warning/limit controls that Windows has, and searching for what is taking up space can be frustrating for casual mac user, I typically use OmniDiskSweeper to look at what is taking up space. But as David C. said, Apple really needs a feature/questioneer/guide for approximating your use, storage and capacity.
Moving to Big Sur, and having a mac that is more than 5 years old, might quantify beyond just figuring out what apps need updating (and costs). Storage is exponential in OS progression, updates (security and OS), and unforseen increases with multiple users and syncing devices (iphone backups, …).
Most do not have home servers, and Apple’s targeted users spend money to save to the cloud (photos, Music, …). Many don’t even understand Time Machine and the need to have an external (even setting iCal to remind to connect the USB drive and do a backup). With a portable and depending on Snapshots can take the user’s space up. And I’ve had some experience with Apple computers and the user writing more than the drive can store (e.g. friend’s daughter at school, saving files, didn’t know it was past the cap…till too late— Apple needs an integral storage watchdog that Notifies 20% remaining, 10% and finally stop the user from storing locally until space is made. Lower than 10GB means problems to the OS, caching, etc.
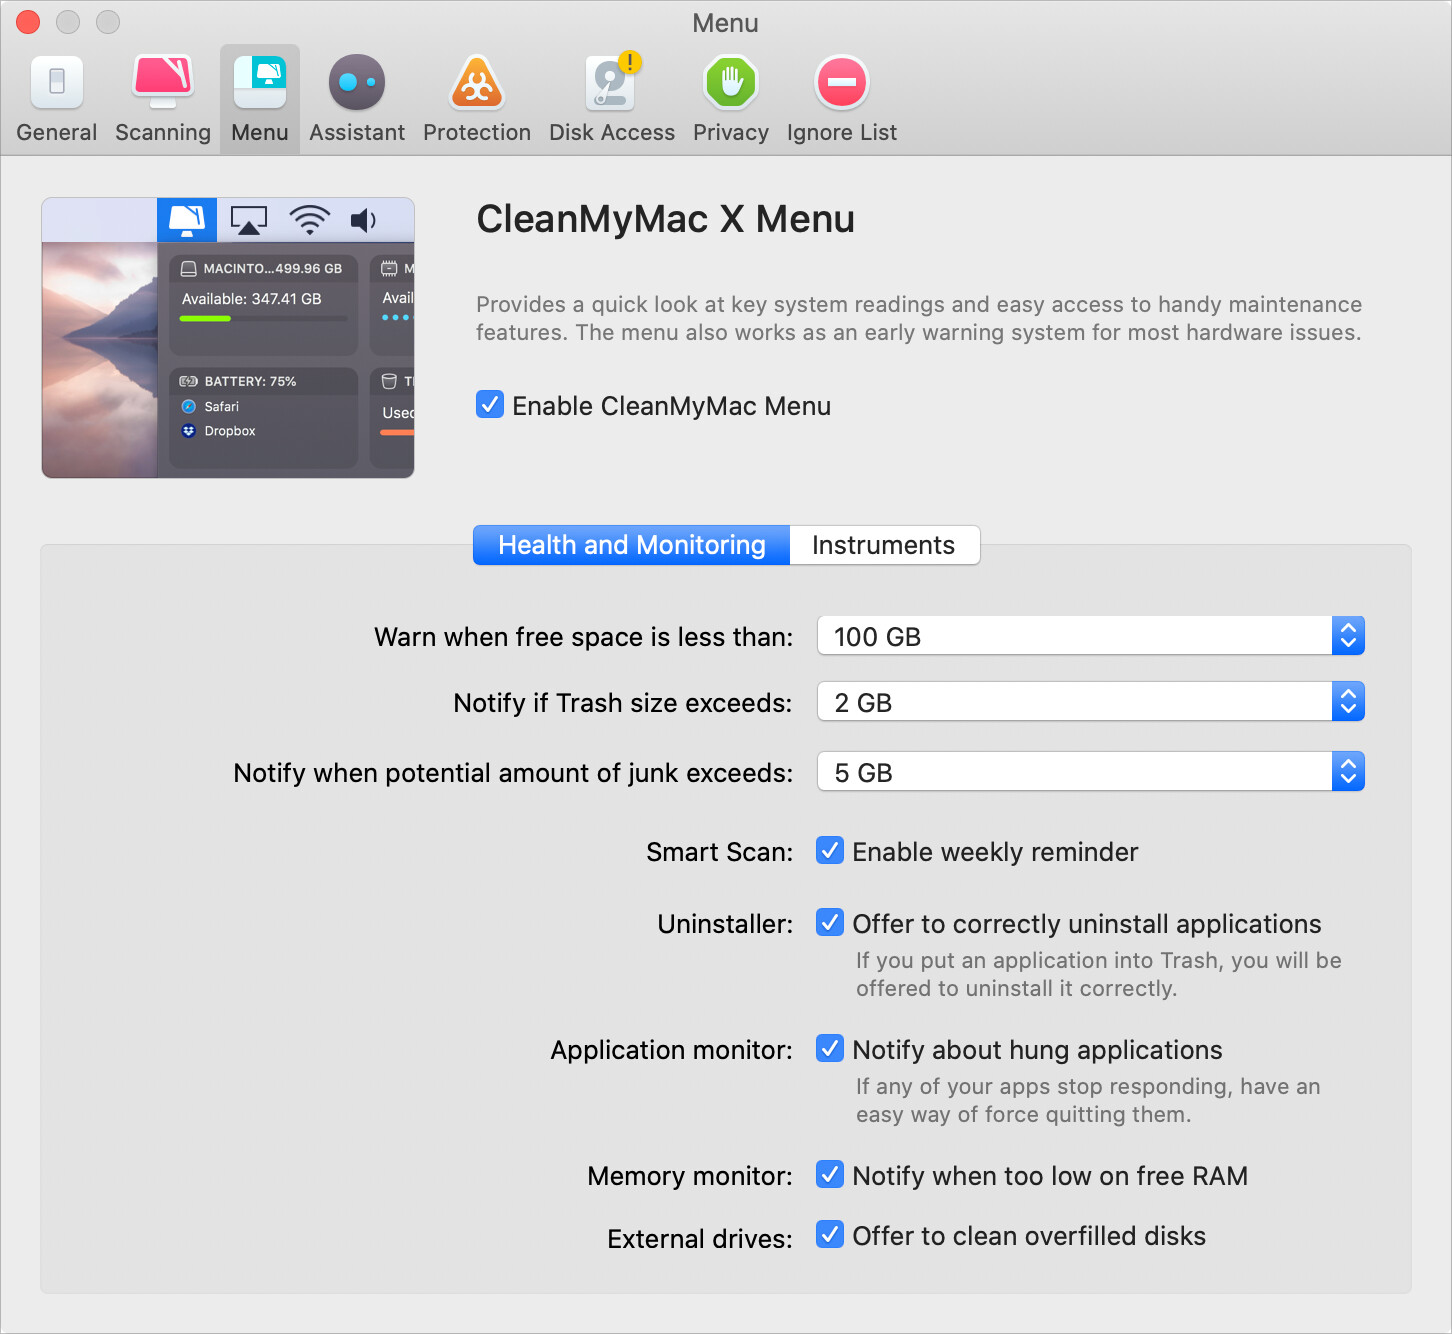
CleanMyMac X has a nice feature for alerting you when free space drops below a certain amount or when the trash gets too big.
But I wonder if there’s a way to do this in macOS itself. This discussion has various hints that suggest there may be a way to set default write options for com.apple.diskspaced to do this. Or it may have gone away in a more recent release. Anyone want to explore for us and report back?
1 Like
In Big Sur, the Storage Tab on the ‘About This Mac’ window can provide useful tools vis the ‘Manage’ button for working with storage on the boot drive. It brings up the ‘Storage Management’ window form the System Information app. If you click the ‘Review Files’ button, you will be presented with a file browser that initially shows the files in the Documents folder (including inside its subfolders) ordered by size. You can switch the folder used via the Sidebar. From the tab bar, you can also specifically see and delete files inn the Downloads folder. The ‘Unsupported apps’ tab shows 32-bit apps from the apps folder. It’s easy to select them and delete them quickly here.
Since I didn’t even look at this before Big Sur, I don’t know if there is a similar utility buried in Catalina and earlier OS versions., but it appears to be an efficient way to deal with candidates for removal if space is tight.
The Storage Management feature has been there since Sierra, so most people who are going to upgrade to Big Sur should be able to use it. It’s good, though I like GrandPerspective and Josh is fond of DaisyDisk for finding large files to remove.
Sierra has this too, never knew that. What does “Optimize” do? Does it do something automatically as soon as you click it or are there other options?
Diane
The article linked above should explain, no?
Ah! Probably. I am a few days behind on emails and apparently missed the prior one - sorry about that!
An Embarrassed Diane
Looks like Apple fixed their updater:
Excellent, if awkward timing for us. I’ll add a note at the top of the article.
Regarding your note about the importance of backing up before doing upgrades (yes!) there is another important point that should be noted here.
The venerable SuperDuper! backup program does not work with Big Sur. The folks from shirt pocket software are well aware of the issue and have been since about November. They report it is due to a change in Big Sur that makes it virtually impossible to make a full backup of a boot volume. (It apparently makes it literally impossible on Macs using the new chip.)
You can back up external non-boot volumes, but those who rely on SuperDuper! should look into this before upgrading!
As I understand it, you should still be able to install Big Sur to an external device and then use SuperDuper! to clone your data volume to that device’s data volume.
The result will be a bootable system, but without the latest system software updates (unless you periodically boot from it and install macOS updates from there). That might be good enough until SD gets updated.
Or you can switch over to CCC. According to Mike Bombich, Apple bundles an APFS replication utility which will properly clone the system volume on Intel Macs, and the latest versions of CCC use it.
The only problem there is if you have an M1 Mac. The Apple utility currently has a bug preventing it from working on M1 Macs, so CCC can’t clone the system volume on one. I do expect Apple to fix this bug (although it’s been several months since it was reported to them) because Apple supposedly uses this utility in-house for pre-loading the factory software image, but who knows when they’ll decide to release a working version for the rest of us.
That is correct, but for those of us who set up our primary automated backups via SuperDuper! the outcome has been quite messy, and the solutions are (still) not great.
In my case, I had SuperDuper! doing automated daily backups to two volumes. One contained the backup of my system volume and the other contained the backup of my external (photography) files volume.
After updating the operating system, my SD backups started failing and my computer was crashing in the middle of the night while trying to do the backups. Once I figured this out (Shirtpocket, usually a great company, never notified us) I had to turn off the boot volume backups so that things would not crash, causing the external data volume backup to crash.
In order to do what you describe with SD! you have to uninstall your current version of SD!, download and manually install an older, deprecated version of the application, re-enter license information, replace the old boot volume backup (likely after reformatting the backup volume), and create a new one that only backs up the hidden data volume of the boot drive.
It isn’t a totally non trivial process.
I wish that Shirtpocket had used their email database to communicate with us about this. I’ve only managed to figure this out by tracking down a blog operated by the owner of the company — it is not part of the Shirtpocket website. I sympathize with them since it seems like Apple may not have given warning. I think Apple deserves some blame here, too
Dan
I’m not familiar with SD, but this seems like more work than should be necessary.
You should (I hope) be able to configure SD to only backup the data volume of your system disk. Then you should be able to download and run the Big Sur installer to install itself to your backup drive, which will create/update its system volume, making it bootable.
It’s awkward, but it may be a good enough workaround for now.
Please read Dave Nanian’s blog item for the explanation of why you need to go through the full process to essentially do that in SuperDuper!. Essentially, the few versions of SuperDuper! arranged all sorts of permissions and clever programming to work with the various issues Apple created in securing the system portion of the boot drive and keeping up the fiction to a user that nothing had changed. Multiple steps are needed to unwind the tricks and get back to a version of SuperDuper that will create a backup that is usable for restoring old data or migrating old data to a new system. The one thing that version can’t do is create a full bootable disk.
Dollar to donuts, Nanian will release a version of SuperDuper! that performs the conversion steps the first time it’s run. However, given that Big Sur has been out for several months, he wanted to provide a way for his users to keep running and still have a reliable backup without waiting for him to release a slick version that really is only different from the older version the first time it is run.
1 Like