Originally published at: Enhance Your Images with Apple’s Clean Up Tool in Photos - TidBITS
To my mind, Clean Up is the most impressive Apple Intelligence tool we have now. Introduced in Photos in macOS 15.1 Sequoia, iOS 18.1, and iPadOS 18.1, Clean Up enables you to remove distracting people and objects from the background of photos, replacing them with AI-generated scenery. Clean Up may automatically highlight items you might want to remove, and you can always scrub over or circle an unwanted one to eliminate it.
Object removal capabilities are widespread in other apps. Since I seldom edit photos, I can’t compare how well Clean Up works to other tools. To an extent, that’s irrelevant—I would never use Photoshop to edit an image or purchase an app purely to remove objects, but I will use Photos. I suspect I’m far from alone.
Also, for snapshots or informal sharing, if Clean Up’s results aren’t perfect, it doesn’t matter—nobody will notice. However, if you’re making a large print or sharing in a venue where the image will attract scrutiny, you might want to switch to a professional tool like Photoshop or Lightroom, or ask a friend with one of those tools to help.
Nevertheless, my testing of Clean Up has provided a sense of where it works well, where it’s unlikely to succeed, and when its results are more variable than you might expect. It can prove valuable when the objects to be removed are small and cleanly silhouetted. However, it may struggle in busy scenes or when the background is difficult to recreate convincingly.
✅ Cleanly Silhouetted Objects
When it’s good, Clean Up is very good. When it’s bad, it’s laughable. It works best when the people or objects you want to remove are relatively small and cleanly silhouetted against an easily faked background.
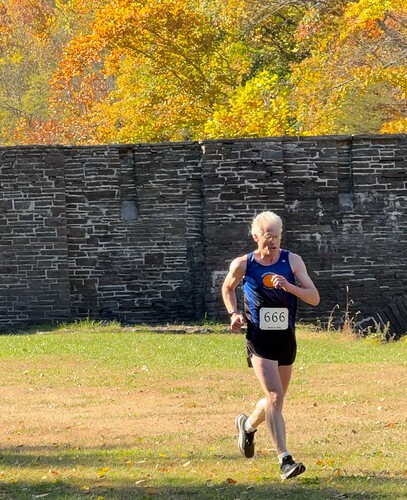
In this photo of me at a cross-country race, the pedestrians and car on the stone bridge behind me are easily removed, as is the blue course marking flag on the ground. (Ignore the general blurriness of the photo—it was taken at a distance using the Camera+ Action mode as part of a burst, and I had to crop heavily to make myself the focus of the shot. Apple’s ads notwithstanding, even the iPhone 16 Pro is a weak camera for sports photography.)
If you zoom into the right-hand photo and look carefully at where the truck was, you can see that Clean Up didn’t do a fabulous job of simulating either the stonework or the leaves. With the stonework, it went a little overboard and replaced pixels that would have been better left alone. In contrast, the leaves are utterly random, but Clean Up introduced an unnatural pattern in the replacement. Regardless, most people wouldn’t notice because the edits aren’t near the subject of the photo, and the leaves have an unpredictable texture to begin with.
Here’s another example where Clean Up performed well. The original was marred by the child’s hat in front of me, and the large metal traffic signal poles and wires also distract from the dragon.
Even though the hat is quite large, it’s silhouetted cleanly against the uniform road surface, which Clean Up can easily fake. Removing the hat was easy, but selecting the metal poles and wires took more time. Nevertheless, Clean Up removed them without a trace because they were backed by either a tree or the sky. Even the man standing in front of the pole looks as if his face is in shadow, although closer examination shows that Clean Up removed part of his head. Again, for informal sharing, Clean Up’s results are entirely acceptable.
❌ Busy Scenes
It can be tempting—even for Clean Up—to remove items in the backgrounds of busy scenes. In my experience with photos like the one below, Clean Up struggles when there are multiple overlapping objects or when the background contains complex patterns or textures that are difficult to recreate convincingly. On the left, Clean Up suggested removing the people under the tent in the background, the car to the left, various shadows, and more—Photos highlights them with a shimmering colorful animation to call out its suggestions.
As you can see on the right, when I took all of Clean Up’s suggestions, the trees look strange; it added a blur to the right of the silver cup and orange bell, and the area occupied by the car and bystanders on the left of the photo gets weird. Ironically, the main thing I wanted to remove from the photo was my shadow at the bottom; although Clean Up didn’t suggest it for removal, it did a good job when I selected it manually.
🤔 Variable Results
Finally, although this image of Tonya finishing a run at one of our Tuesday night workouts doesn’t really need much editing, it illustrates an important fact about Clean Up, which is that one removal may affect the next.
For the test, I decided to focus the entire photo on Tonya in the front, removing the other runners, the silver car on the road behind them, the little barbecue grill and picnic table to the left of her head, and the power lines cutting across the top right of the photo.
Clicking each runner or group of runners removed them, with Clean Up filling in an AI-generated background based on the surroundings behind them. For the first two runners on the left, this worked almost flawlessly. However, removing the larger groups to the right resulted in the ugly artifacts in the left screenshot below. The groups are so large that Clean Up doesn’t accurately predict what’s behind them.
However, it reveals a subtle but important fact about Clean Up. Individual removals may affect subsequent ones by changing the nearby pixels. In the left screenshot above, I removed each group of runners from left to right, which most people who read in that direction would probably do. When I reversed the direction, removing the runners from right to left, Clean Up was able to do a better job with the smaller groups in the back, creating a more realistic background you can see in the middle screenshot above.
The variability I encountered with the order of removals extends to using Clean Up on other platforms, too. When I edited the photo on my iPhone 16 Pro, Clean Up automatically highlighted the same runners and correctly removed the items I scrubbed over with my finger. Although scrubbing with a finger wasn’t as precise as with the Mac’s pointer, I could pinch to zoom first to select the smaller objects more accurately.
However, as you can see in the rightmost screenshot above, the background area behind where the runners were is different, and the iPhone version of Clean Up left a more prominent and unsightly artifact than the Mac version. I won’t bore you with yet another screenshot, but I was able to use Clean Up once again to remove that artifact.
💡 Clean Up Tips
Here’s what I’ve learned about using Clean Up effectively:
- Choose photos where the people or objects to be removed are relatively small and cleanly silhouetted against an easily faked background.
- When removing multiple overlapping or nearby selections, the order in which you remove them may make a difference. If you’re unhappy with the initial result, try removing objects in a different order.
- Make additional passes with manual Clean Up selections to remove previously generated artifacts.
- Within an editing session, you can undo any individual Clean Up action with Command-Z or by tapping the Undo button on an iPhone or iPad. Undo them all with Revert to Original. Command-Z also reverses Revert to Original, so you can check your edits against the original without manually recreating them.
- Results may differ slightly between the Mac and the iPhone. (I presume the iPad’s results will be similar to the iPhone’s, but I don’t have one running iPadOS 18.1 to confirm.) If you care deeply about getting the best results and aren’t happy with one platform, try another. Manual selection is the most precise on the Mac, but remember that you can pinch to zoom in on an iPhone or iPad to scrub over small objects more precisely.
I have one final recommendation, which is to compose your photos to avoid extraneous or distracting objects in the background so you don’t need to use Clean Up at all. I try to remember that when taking photos, so relatively few of mine would benefit from Clean Up, which made it hard to find examples for this article. It’s no coincidence that the photos above are all action shots taken in public situations where it was difficult or impossible to control what appeared in the background.
Ultimately, Clean Up works well and may be able to rescue photos that would be great without distracting objects cluttering the background. I encourage you to try it the next time you have a photo that might benefit from some selective removal of objects.
However, as Jeff Carlson showed me after his edit pass, a professional tool like Lightroom may be able to do a significantly better job—I can’t see any oddities or artifacts in his version below. Remember that Clean Up as we see it today is Apple’s first pass; it’s likely to improve in future releases.


