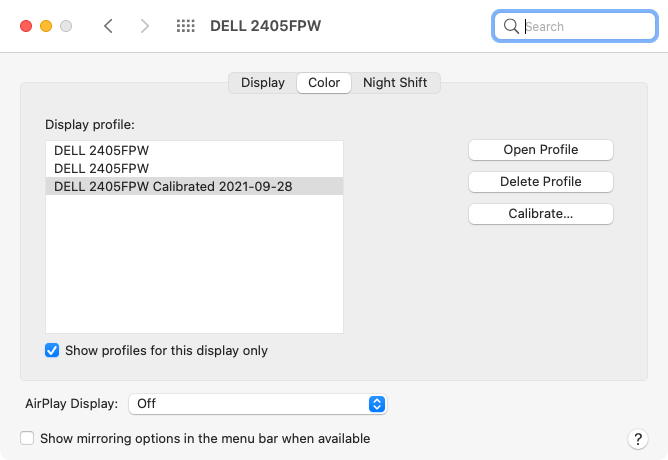
Display calibration is pretty easy to do. If you don’t have calibration hardware, you can go to the Displays → Color system preference panel:
And then click Calibrate… to launch a utility you can use to manually perform a calibration (based on what you can see). Hold down Option when you click the button to enable “Expert” mode, which will give you a more robust calibration:
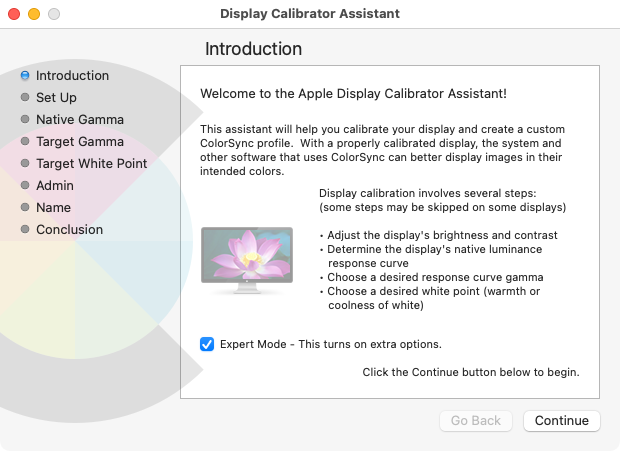
The results won’t be as good as using a hardware calibrator, but they’re definitely better than nothing.
With display calibration, you will know that any edits you make to your photos will not be messed up by your display’s output. At least not as badly as without calibration.
For printing, you should be able to select a color calibration profile from the print dialog. The specifics will depend on your printer driver. This is what I see with my Brother laser printer:
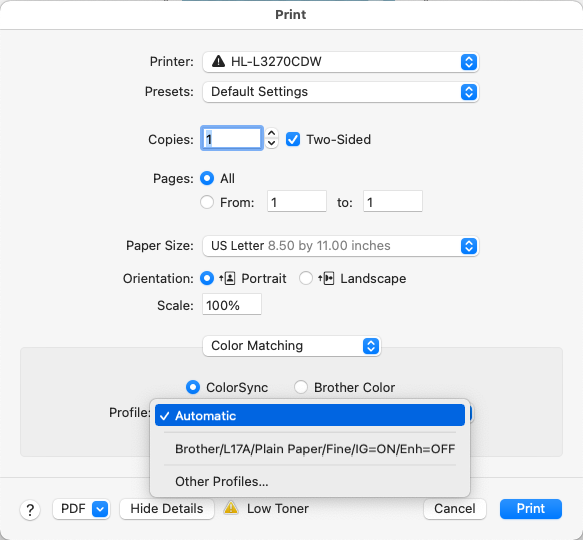
I have a “Color Matching” page in the printer dialog. If I select “Brother Color”, it uses Brother’s built-in calibration data. If I select “ColorSync”, I can select any color profile installed in macOS.
In general, using the default works fine. Creating a custom printer calibration file can be pretty tricky and requires additional hardware. It usually involves printing a test image and then scanning the printout. And it, of course, assumes your scanner has already been calibrated (which is done by scanning a purchased test-image with calibration software).